Turn on the lights
Instructions for setting up and using Feedmas.
Create a new project
If you're new to Feedmas, once you've setup your account and verified your email, you'll then move right into creating your first project.
If you're wanting to set up a new project, click on the project dropdown on the header and then select the option to Create New Project.
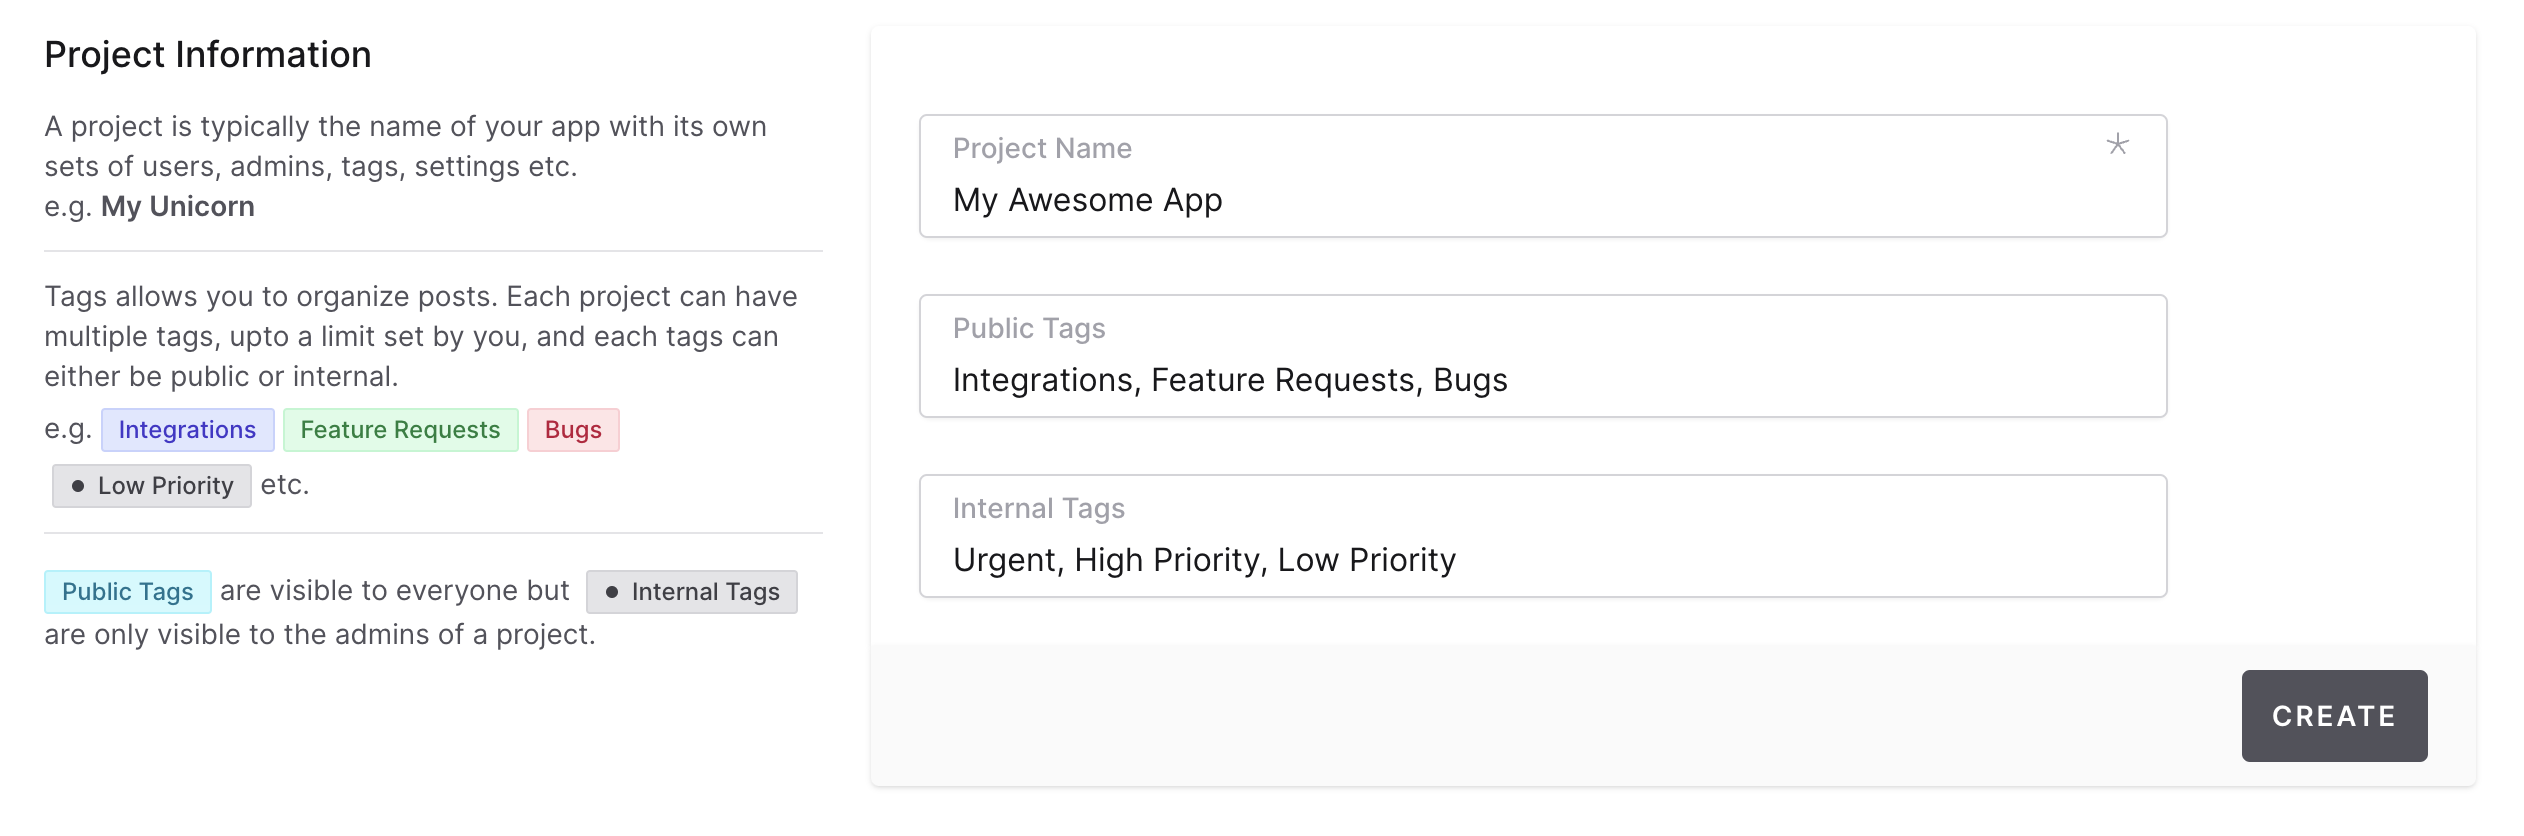
Fill in the project information for your new project.
Enter a Project Name, this will be the name of your new project and you'll see it listed throughout Feedmas. You're users will also see the name of your project in emails that they received.
You can change the project's name as well as add a project logo from the project settings > info section.
Enter Public Tags and Internal Tags. Public tags will be available to tag to submitted items that you receive and will be publically visible. Internal tags will only be seen by your team.
Add widget to your web app
The widget is what collects issues, feedback, ideas, and so on from your users. We recommend making the widget easily accessible in your web app so that your users can quickly find it and submit things that are on their mind before the moment passes.
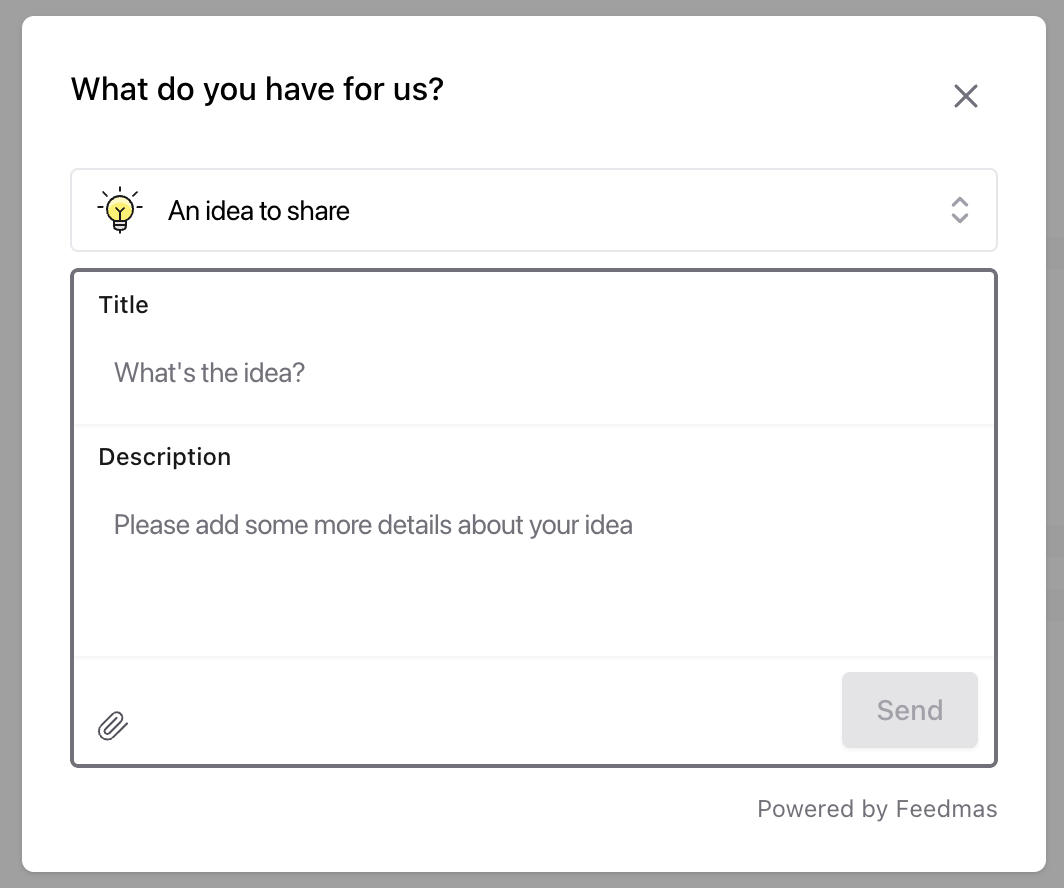
You can find your widget's integration script in the project's settings > widget section.
It will look something like this:
<script>
(function(o, m, g) {
    window[o] = window[o] || function() {
      (window[o].q = window[o].q || []).push(arguments)
    }
    var hd = document.getElementsByTagName('HEAD')[0]

    var js = document.createElement('script')
    js.id = o
    js.src = m
    js.async = true
    hd.appendChild(js)

    var link = document.createElement('link')
    link.rel = 'stylesheet'
    link.type = 'text/css'
    link.href = g
    hd.appendChild(link)
  }('Feedmas', 'https://f.feedmas.com/fw.js', 'https://f.feedmas.com/fw.css'))
  Feedmas('init', {'project': '<your-project-id'})
</script>
The above script should be available on every page you'll want your users to be able to access the widget on. We recommend adding it to a global layout file for easy placement and management.
So that your users can easily call the widget, add a clickable button somewhere that is easy for your users to locate.
Here's an example:
<button onclick='window.feedmas.open({"userName": "Jan Doe", "userEmail": "[email protected]" })'>
    Send Feedback
</button>
In addition to name and email, you can pass along as much metadata as you like. The metadata will be included in the user's ticket that is submitted. Just add the metadata in JSON format.
{"plan":"pro plan", "page":"About Us", "device": "mobile"}
VueJS example
<template>
  <button  @click="openFeedmas"> Send Feedback </button>
</template>

<script>
  export default {
    setup() {
      const user = computed(() => usePage().props.value.auth)
    },
    methods: {
      openFeedmas() {
        window.Feedmas.open({ userName: this.user.name, userEmail: this.user.email })
    },
    mounted() {
      (function(o, m, g) {
        window[o] = window[o] || function() {
          (window[o].q = window[o].q || []).push(arguments)
        }
        var hd = document.getElementsByTagName('HEAD')[0]

        var js = document.createElement('script')
        js.id = o
        js.src = m
        js.async = true
        hd.appendChild(js)

        var link = document.createElement('link')
        link.rel = 'stylesheet'
        link.type = 'text/css'
        link.href = g
        hd.appendChild(link)
      }('Feedmas', 'https://f.feedmas.com/fw.js', 'https://f.feedmas.com/fw.css'))
      Feedmas('init', {'project': '<your-project-id'})
    }
  }
</script>
Set notifications
Add new notification profile
In your project's settings > notifications, you can add new notification profiles.
Feedmas currently offers the following 3 notification channels:
- Discord
- Slack
Give your notification profile a descriptive name, so that you'll easilly be able to distinguish it from others, select a channel, and select whether it will be a private notification profile for yourself only, or one that is viewable by your team members.
If you selected Discord or Slack, you'll need to locate the appropriate webhook and include it during setup.
Manage issues and feedback
Want to do something quickly? Try clicking 'cms' + 'k' on your keyboard for a list of shortcuts (and confetti 🎉).
When a user submits an item, you'll be able to see the item in the Inbox along with any metadata that you configured to be sent over.
Along with a text-based message, users can also send images. You'll be able to see images on the right column and inline with new messages.
To respond to a user, select the response bar at the bottom of the center column. Enter your text as well as any attachments you want to send back to the user. There is a format bar on the top that will help you format your message. Click Reply to send the message, which will be delivered to the user via email.
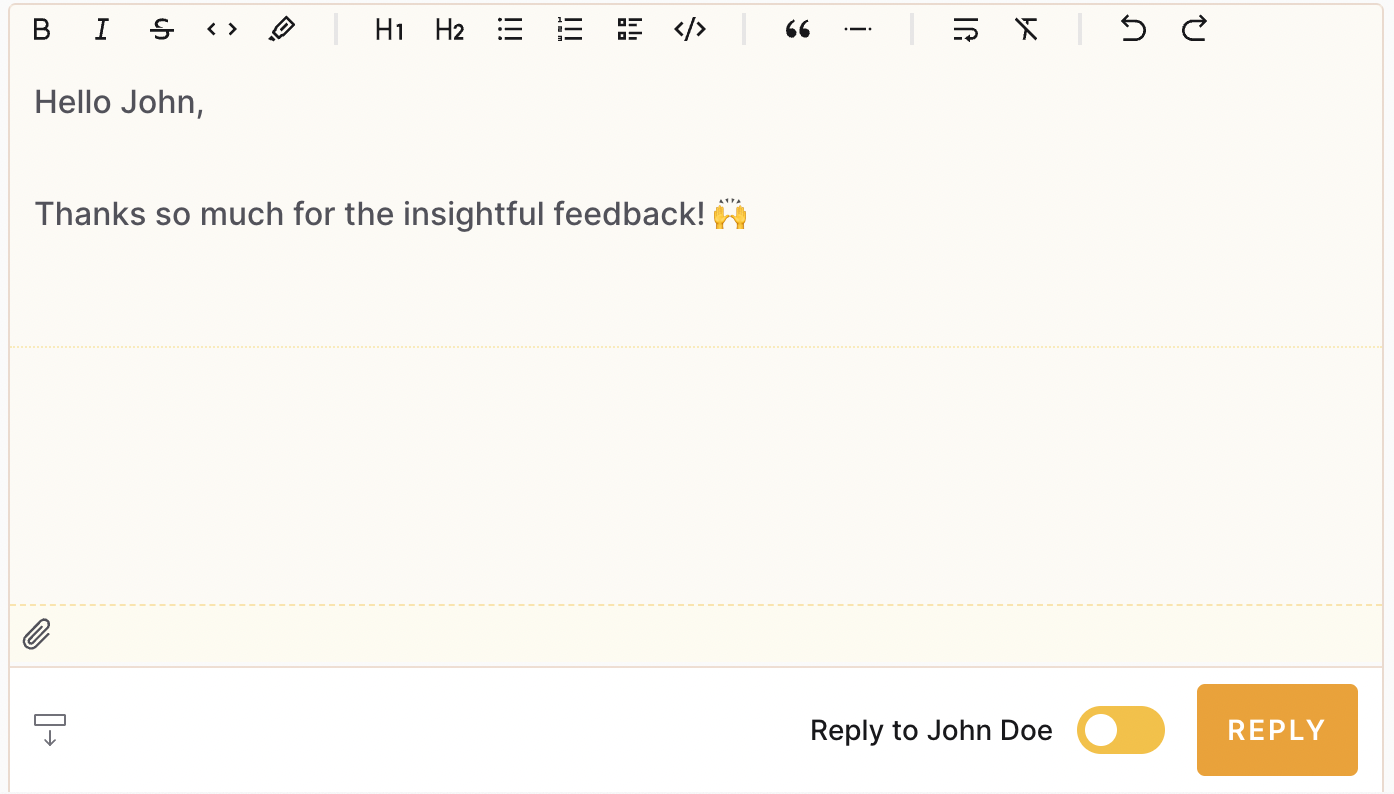
You can also add an Internal Note that will be only visible to team members by selecing Add an internal note. Don't worry, users will not see this message! You may also call out team members by typing the '@' symbol and then their name. This will send an email to the user as well as add the to the watch list for the item.
Worried that other team members are messaging the user at the same time? Feedmas will show the avatar for any other user that has the response window open, in real-time, so that you don't step over each other.
The middle column will display the thread for coversation.
Add item on behalf of a user
Sometimes you may hear or see something outside of a user explicitly sending in an item. If you want to add on behalf of a user, click on the floating button at the bottom of the left column to create a new item for the user. The user will not be notified of the item until you respond to the new item like you would with any other item that comes in.
Resolve and archive
You can mark an item as Resolved by selecting the ellipsis icon and the clicking 'Resolved'.
You can also select Archive to move the item to the archived section.
Manage topics
Topics is where you can tie together multiple related issues to discuss them further internally, away from any single issue. This allows you to better keep track of and internally discuss recurring themes.
You can create a new Topic from the Topic's section or from any issue by clicking on the ellipsis icon and then selecting Add to Topic.
Any communication within a topic will only be seen by internal team members. The person who submitted the issue will never see communication in a Topic - you will continue to communicate to the submitter from the actual issue only.
Manage team members
Don't go at it alone! Invite your team to help out with issues, take part in learning more about your users, and collaborate to build something truly excellent for your users!
Under your Avatar menu, select Company Members. This is where you'll invite new internal users and manage existing.
Once a team member has accepted your invitation, you can then go to your project's settings > Memberships and then select which company members can manage the project. Members will only have access to the project and privilesges to assist with items that come in if they have management access.
Add macros - quick responses
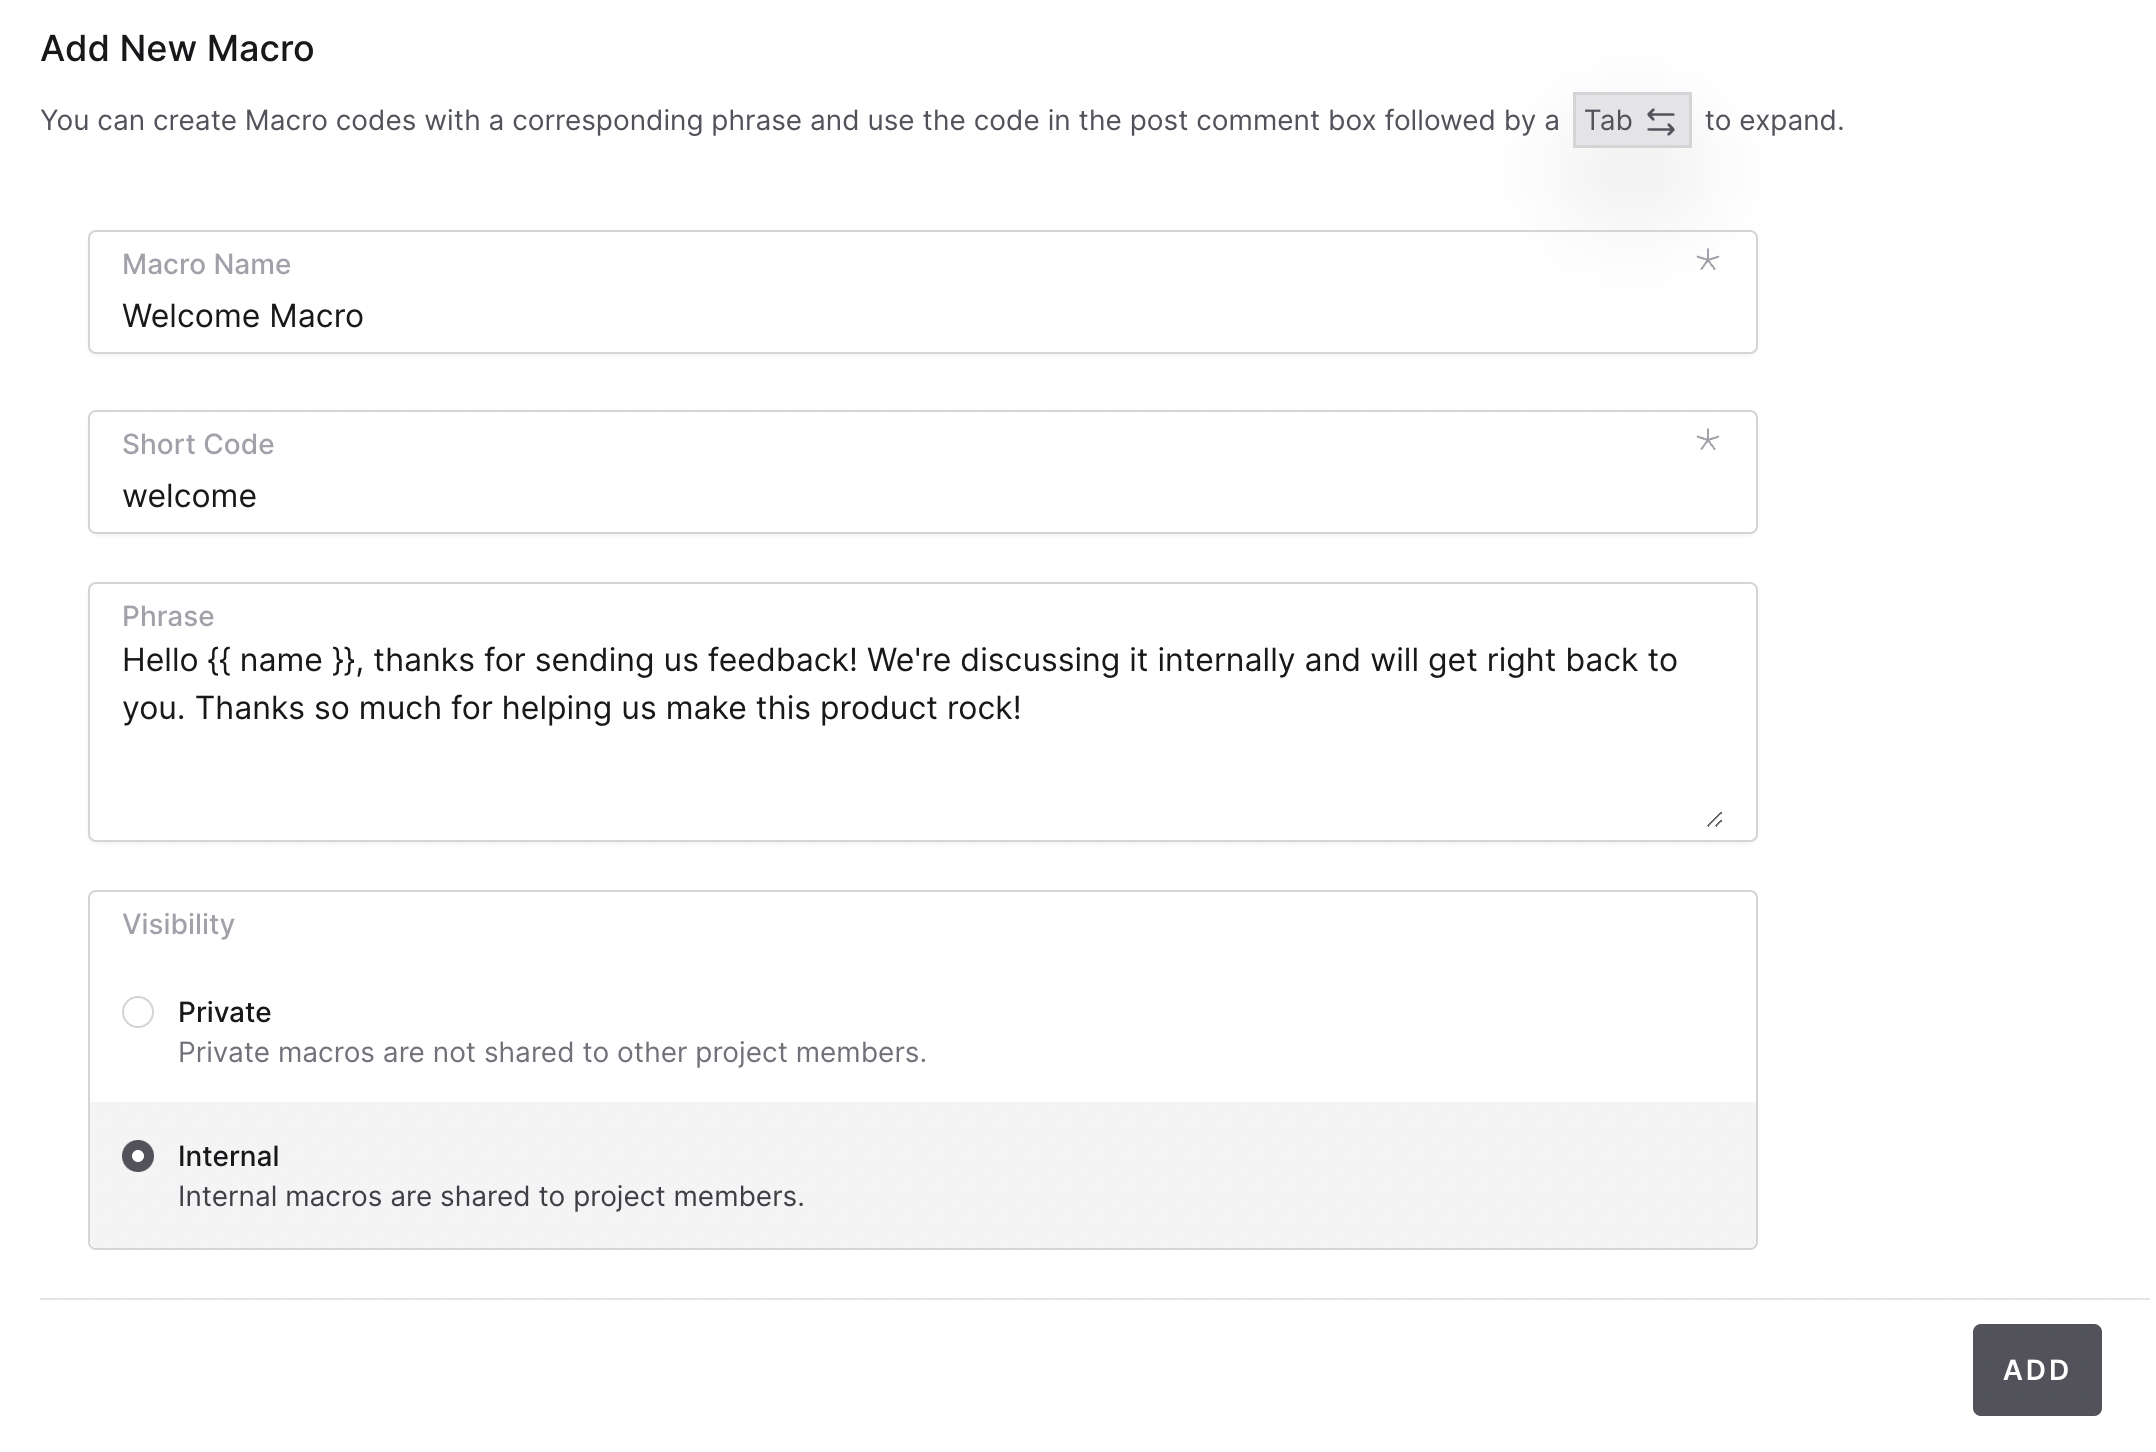
Do you feel like your sending similar responses over and over? Create a marco!
Marcos are perfect for creating templated responses so that you can save a bit of time when you are answering similar questions.
You can create new macros from the project settings > Marcos section.
Create your signature
In project settings > signature, add your custom signature for your project. Your signature will be sent along with your responses to your users.
Integrate with GitHub
Is your project code housed in GitHub?
If so, we suggest enabling the GitHub Integration.
This integration allows you to quickly add items that come into your inbox as issues in your GitHub project. You'll probably even find yourself submitting issues via Feedmas to add them to GitHub. That's what happened with us! 😀